

Overview
Google Merchant Center lets you upload your product catalog so it can appear across Google surfaces such as Search, Shopping, Display, and more. To run Shopping or Performance Max campaigns, you need to link your Merchant Center account to Google Ads and have your products approved. Once that’s done, you can start sending ecommerce event data through Linkrunner for proper attribution.Before you begin, make sure you have:
- A Google Ads account set up and linked to Linkrunner (see Google Ads setup)
- Products ready to upload to Google Merchant Center
Step 1: Create a Google Merchant Center Account and Link to Google Ads
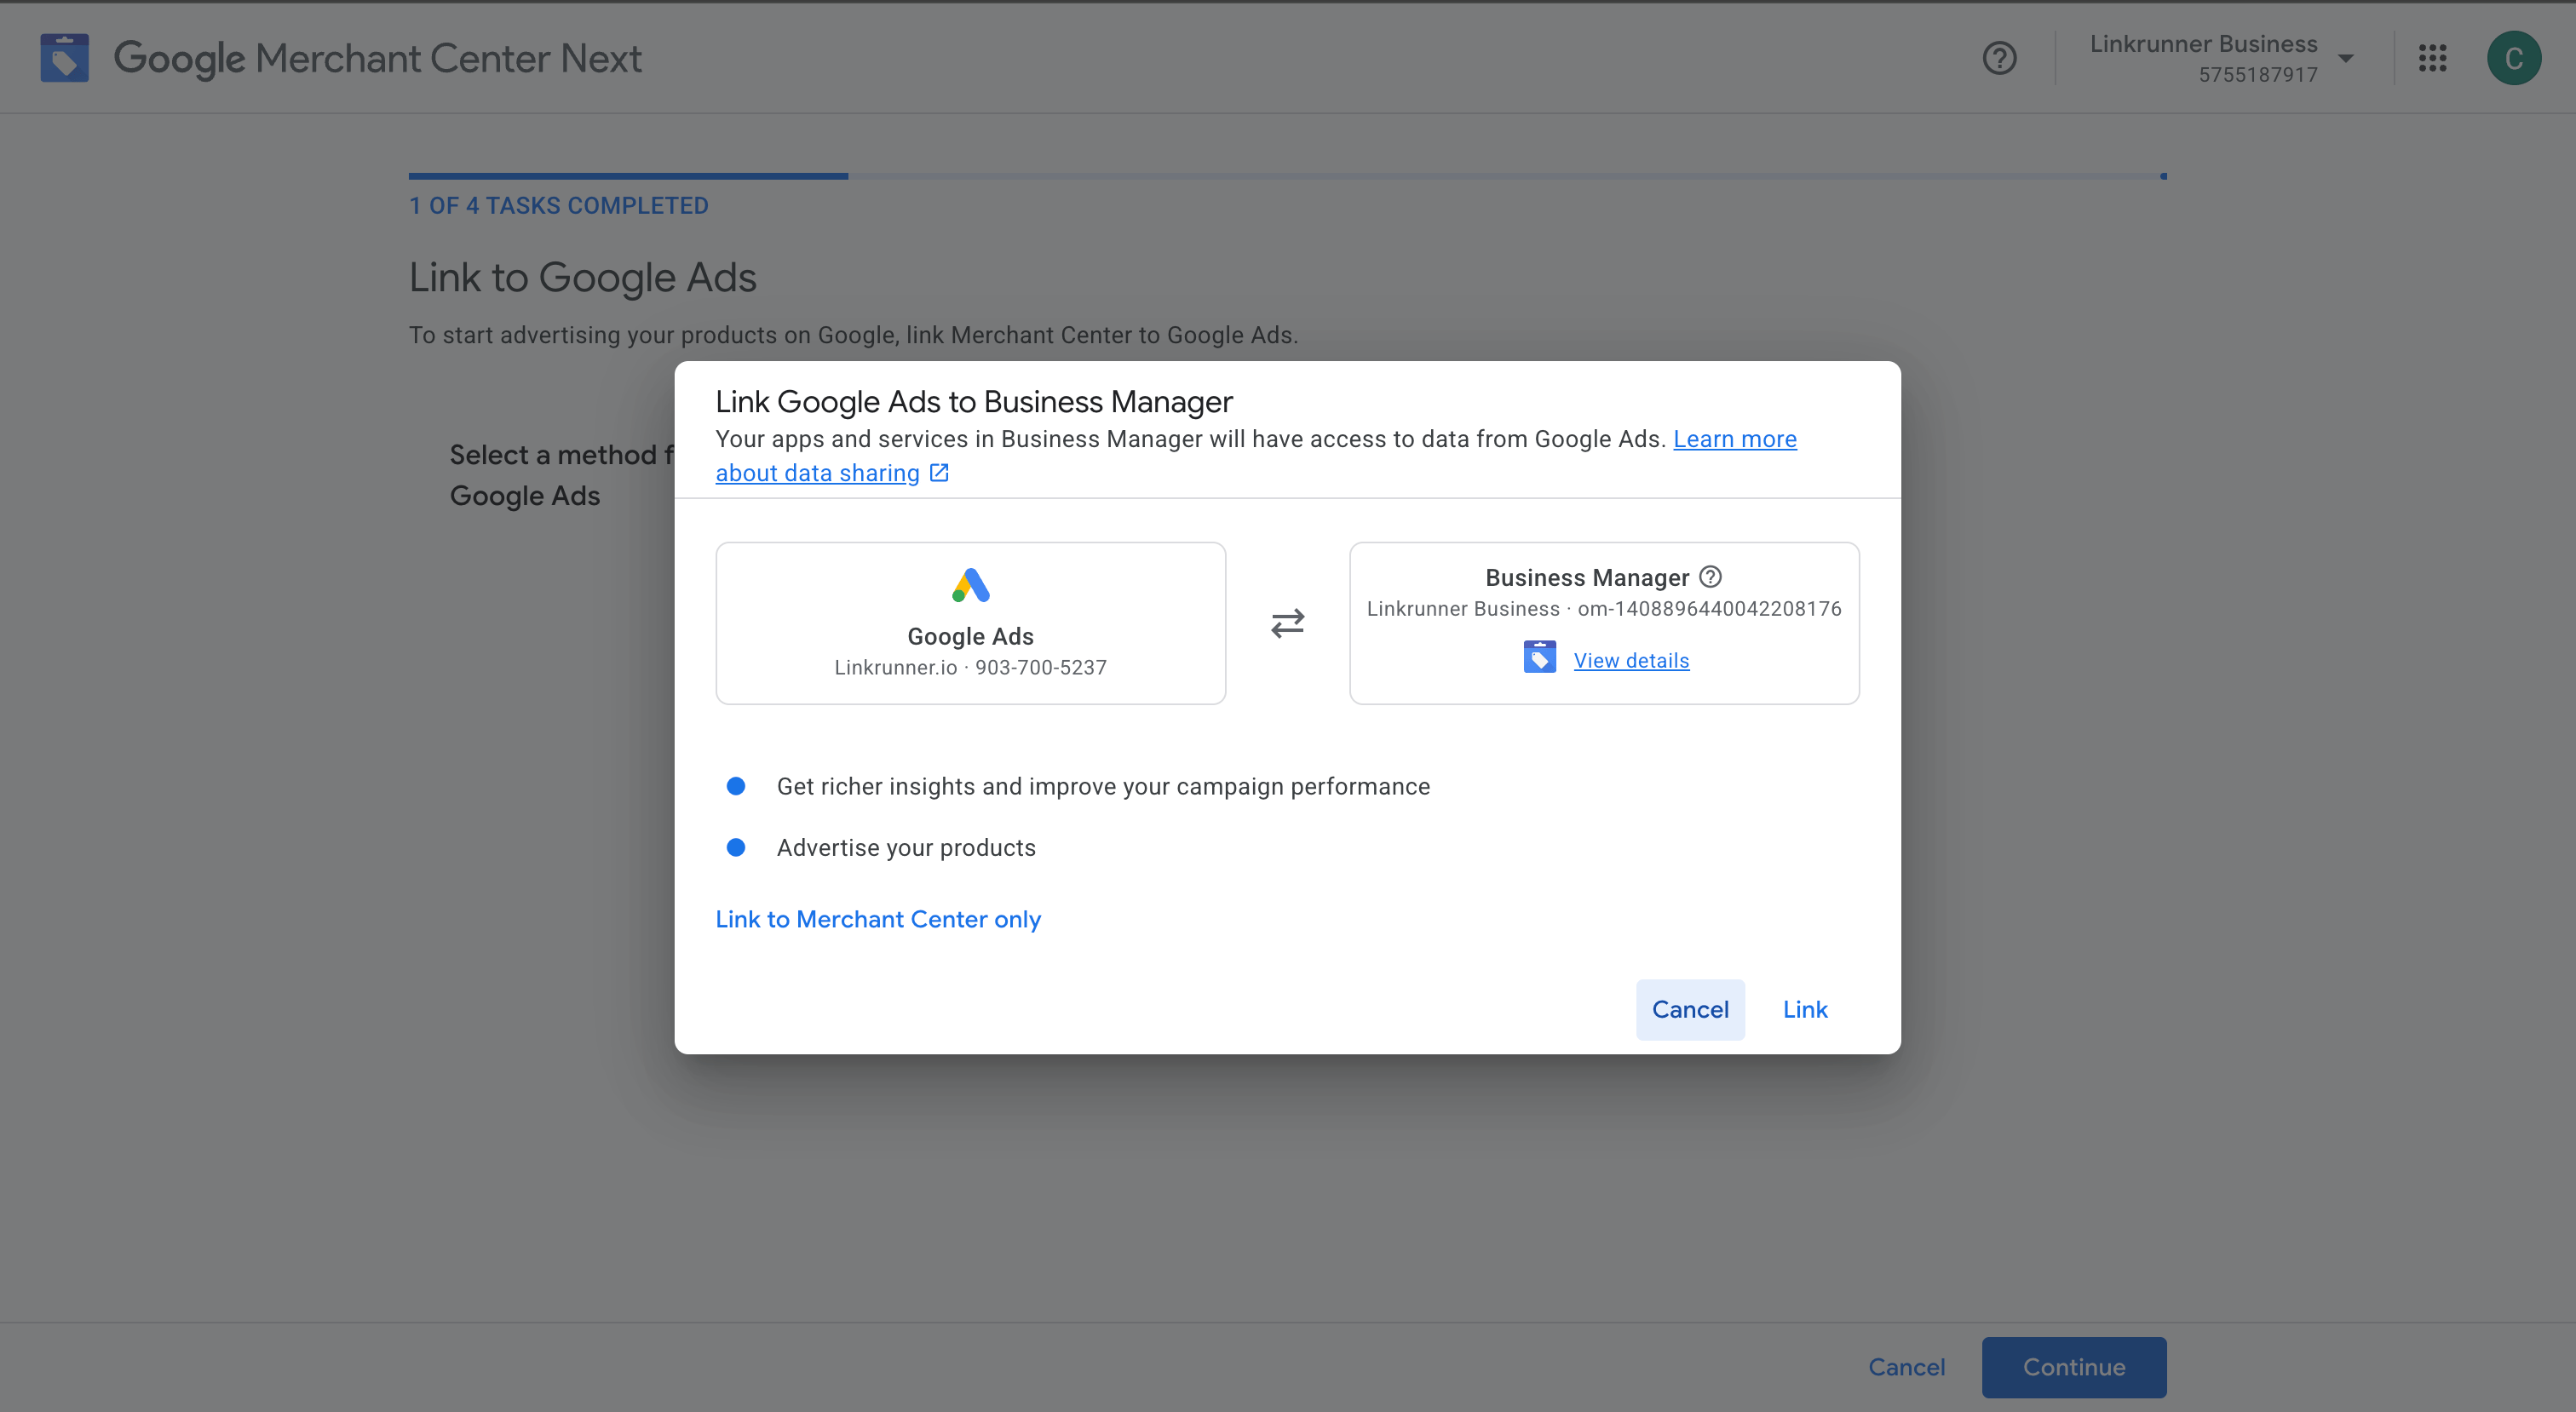
First, create your Google Merchant Center account at merchant.google.com. During setup, you’ll provide your business name, website URL, and country. Once your account is created, you need to link it to your Google Ads account so your product data can be used in campaigns.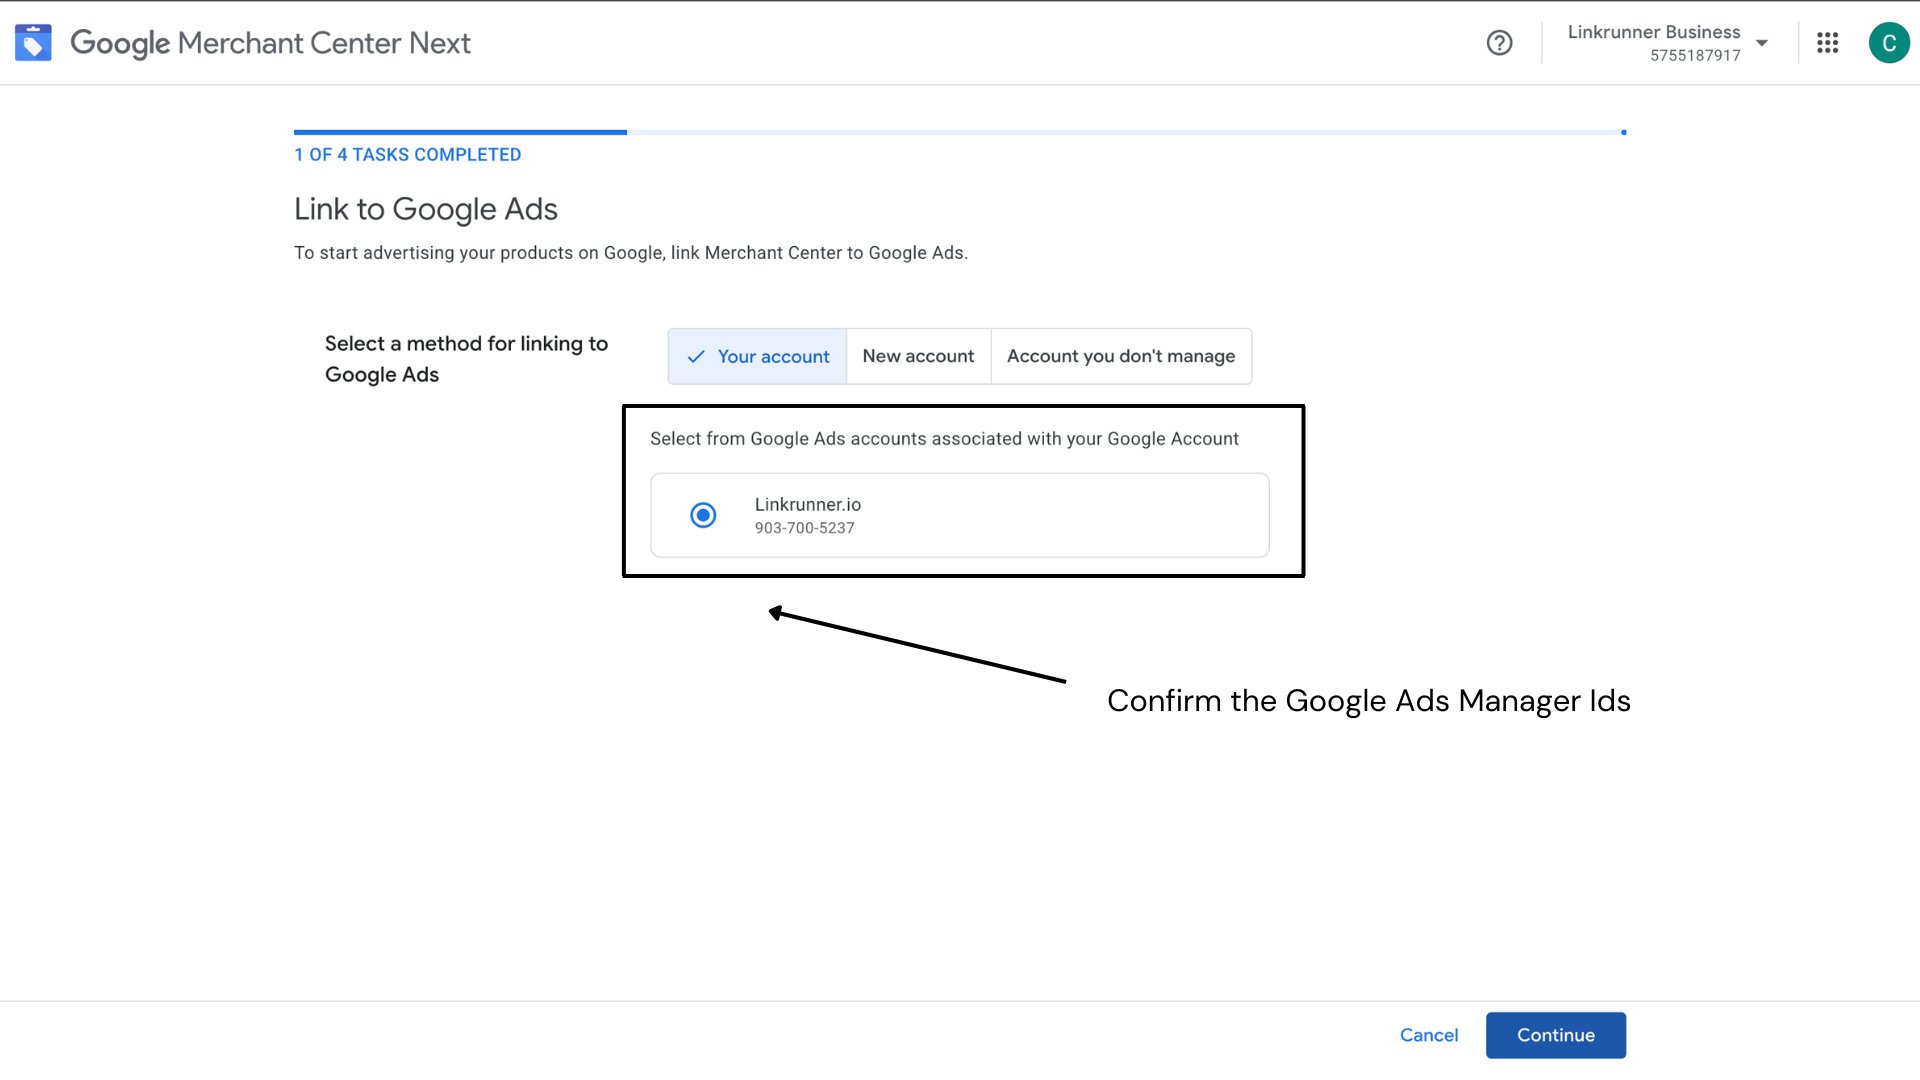
- In Google Merchant Center, go to Settings → Linked accounts.
- Under Google Ads, click Link account.
- Enter your Google Ads customer ID and send the link request.
- In Google Ads, go to Tools → Linked accounts → Google Merchant Center and approve the request.
Step 2: Add Products to Google Merchant Center
With your account set up and linked, the next step is adding your products. You can do this manually, via a spreadsheet feed, or through a scheduled data feed URL.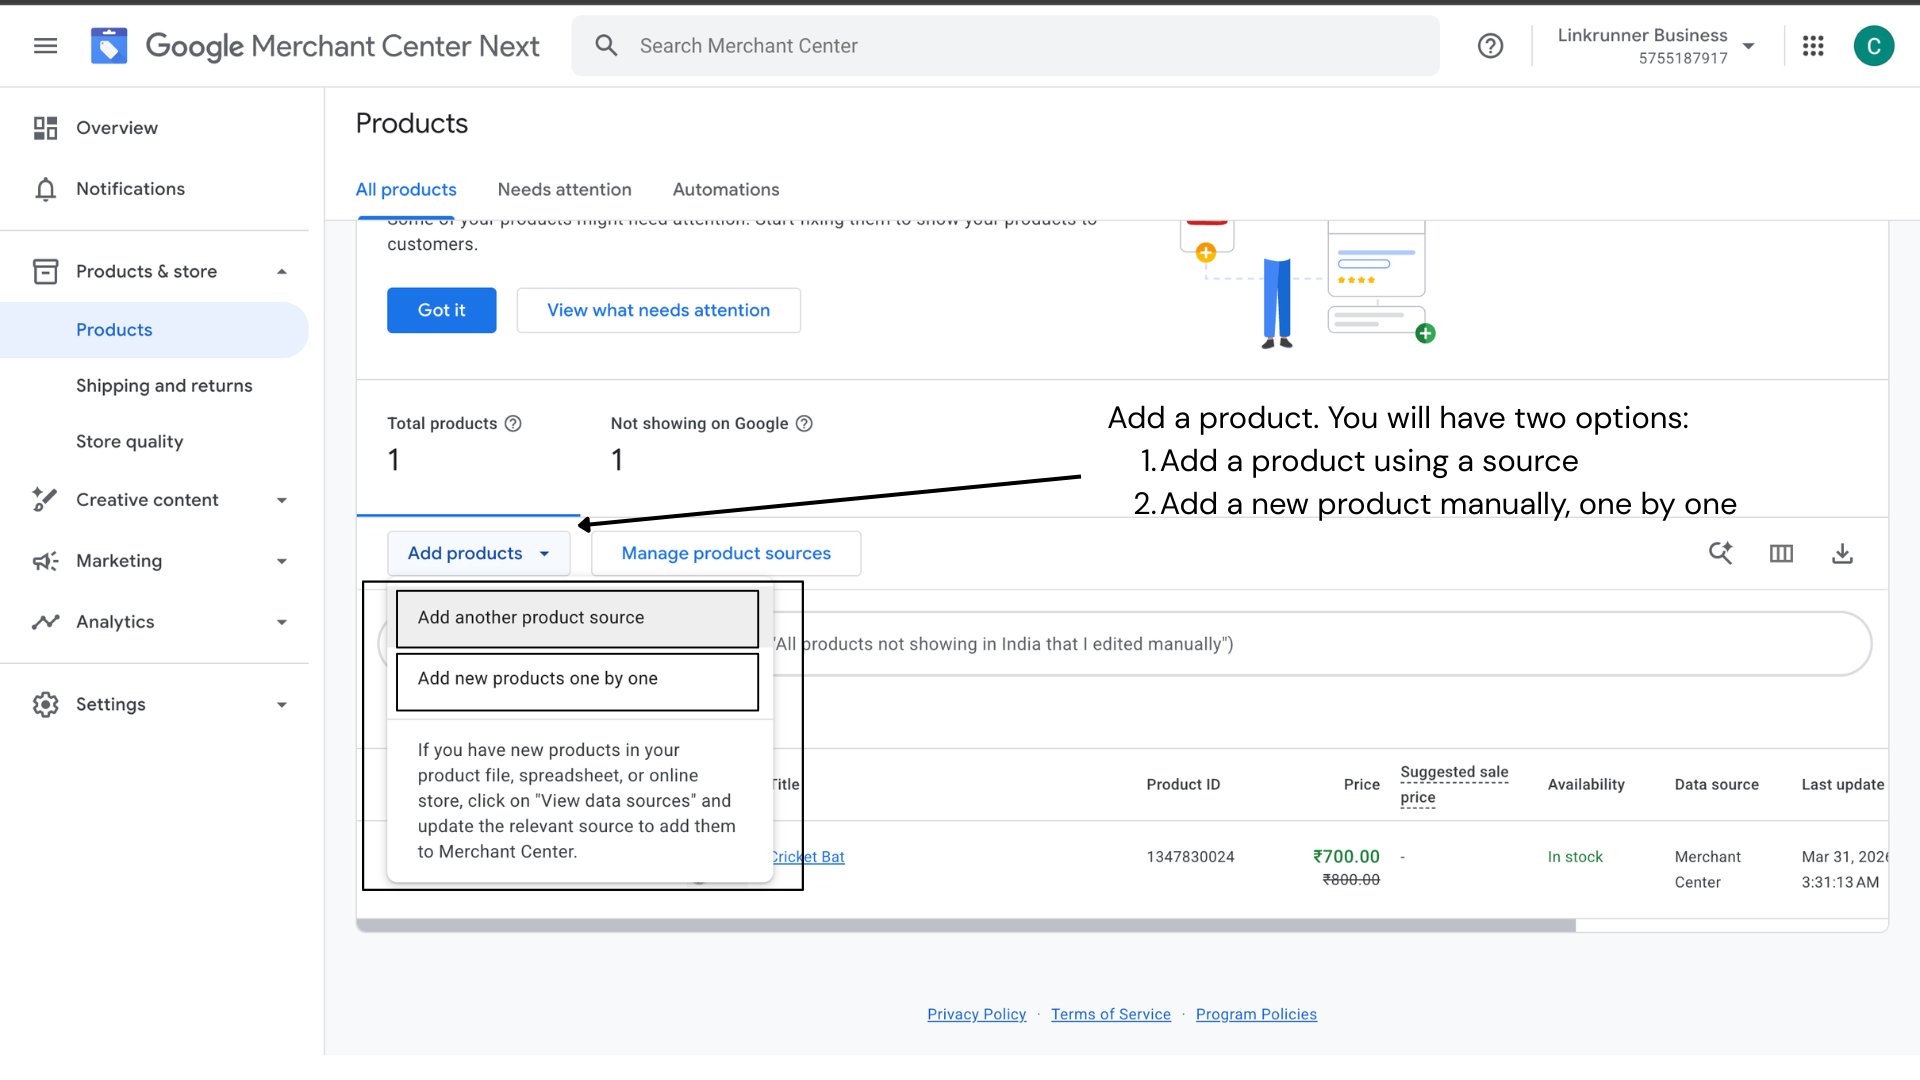
- Title: clear, descriptive product name
- Description: accurate product details
- Link: the product page URL on your website
- Image link: high-quality product image URL
- Price: must match the price on your website
- Availability:
in stock,out of stock, orpreorder - Brand, GTIN or MPN: for product identification
Step 3: Match Product IDs with Your Backend
This is a critical step. The product IDs in Google Merchant Center must exactly match the product IDs you use in your backend and send through Linkrunner events.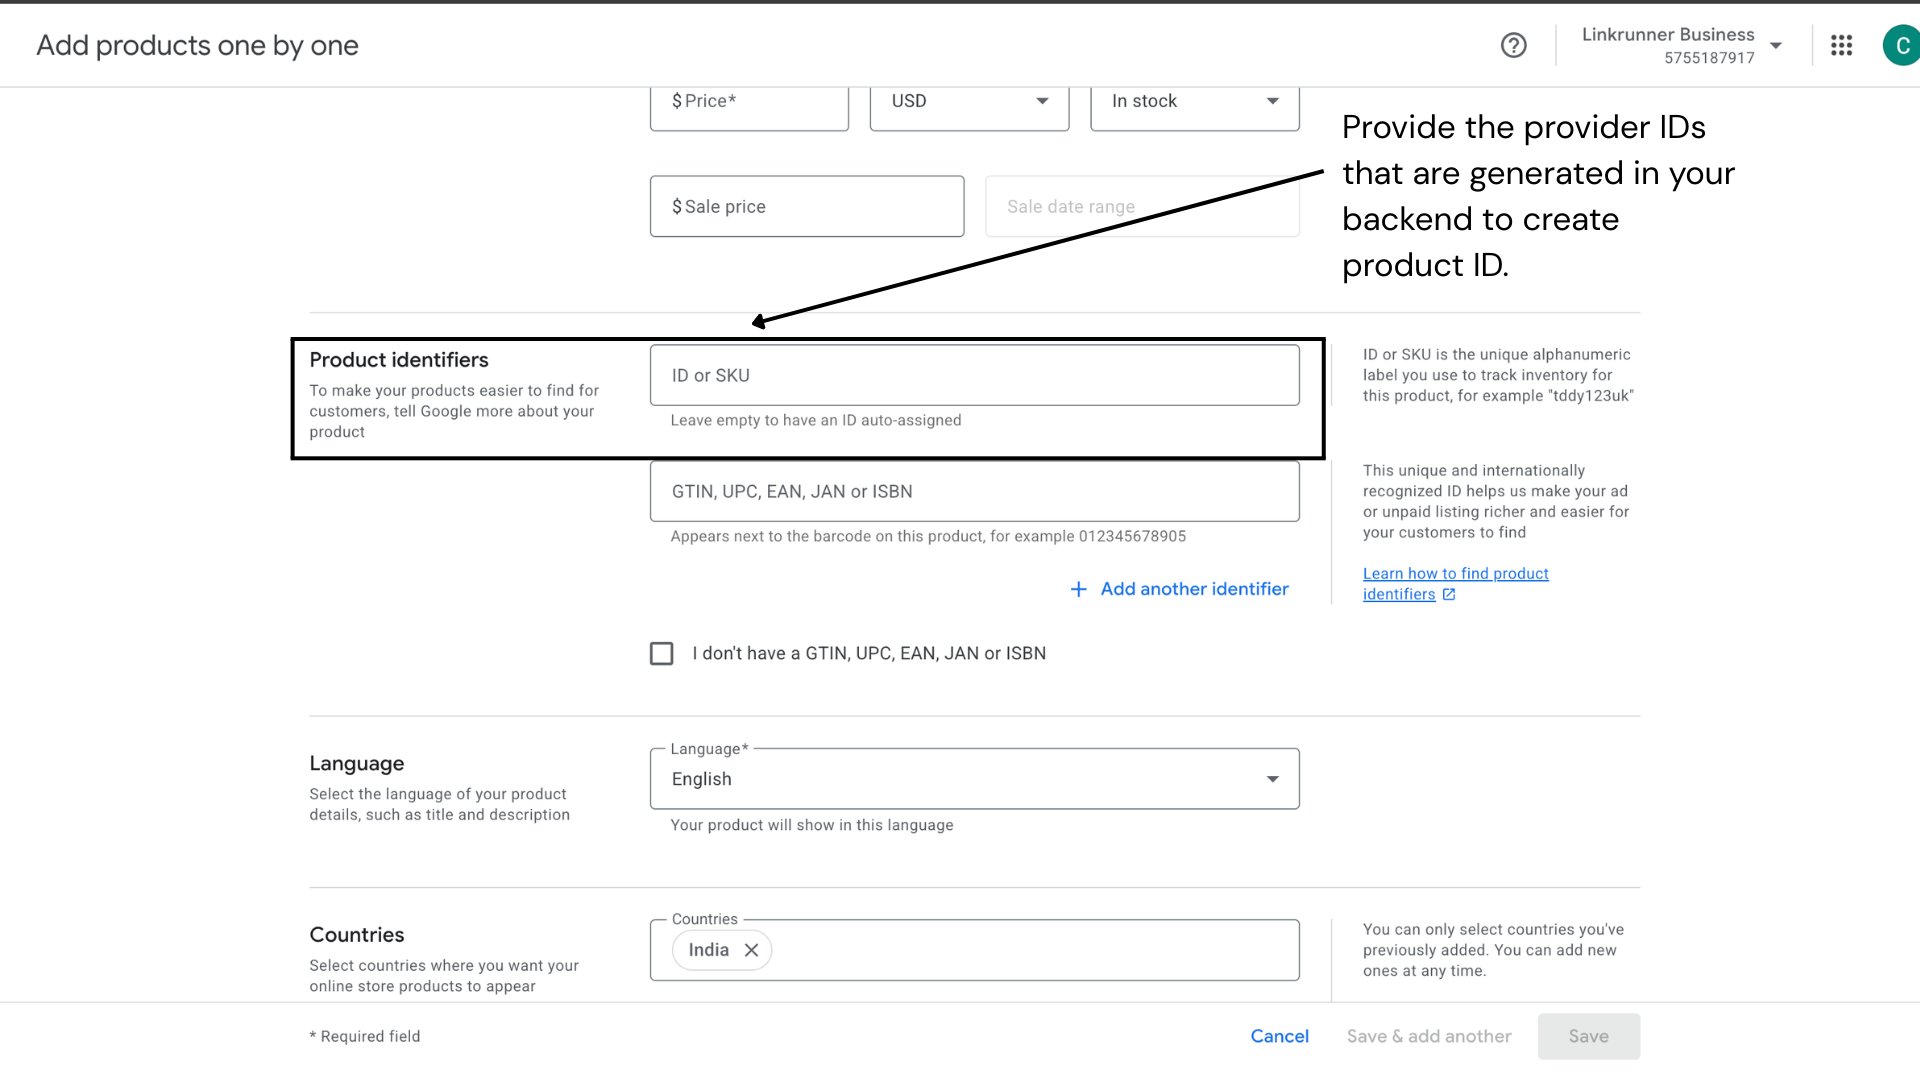
offer_id). This is the value you’ll use when sending ecommerce events through Linkrunner. If these IDs don’t match, Google won’t be able to attribute events back to the correct products.
Step 4: Event Mapping
Once your products are approved and your campaign is live, you need to map your custom app events to the standard Google ecommerce events in the Linkrunner Dashboard. This tells Linkrunner which of your events correspond to which Google conversion actions. There are 3 essential events to map:- Your view item event (e.g.,
view_item,item_viewed) → maps toview_item - Your add to cart event (e.g.,
add_to_cart) → maps toadd_to_cart - Your purchase event (e.g.,
FIRST_PAYMENT,DEFAULT) → maps toecommerce_purchase
Understanding event_data for Google
When sending events via the Capture Event API, Capture Payment API, or the Linkrunner SDK (trackEvent and capturePayment methods), you need to include specific fields in event_data so Google can correctly attribute conversions and match products in your Merchant Center catalog.
Required Fields
view_item
Fired when a user views a product page.add_to_cart
Fired when a user adds a product to their cart.ecommerce_purchase
Fired when a user completes a purchase.eventData fields apply across all SDKs. For platform-specific examples, refer to the Ecommerce Events section in each SDK guide: React Native, Flutter, iOS, Android.
Verifying Events in Google Ads
Once you start sending events through Linkrunner, you can verify they’re being received in Google Ads under Goals → Summary. You’ll see your mapped conversion actions (view_item, add_to_cart, ecommerce_purchase) listed there with their recorded conversion counts.
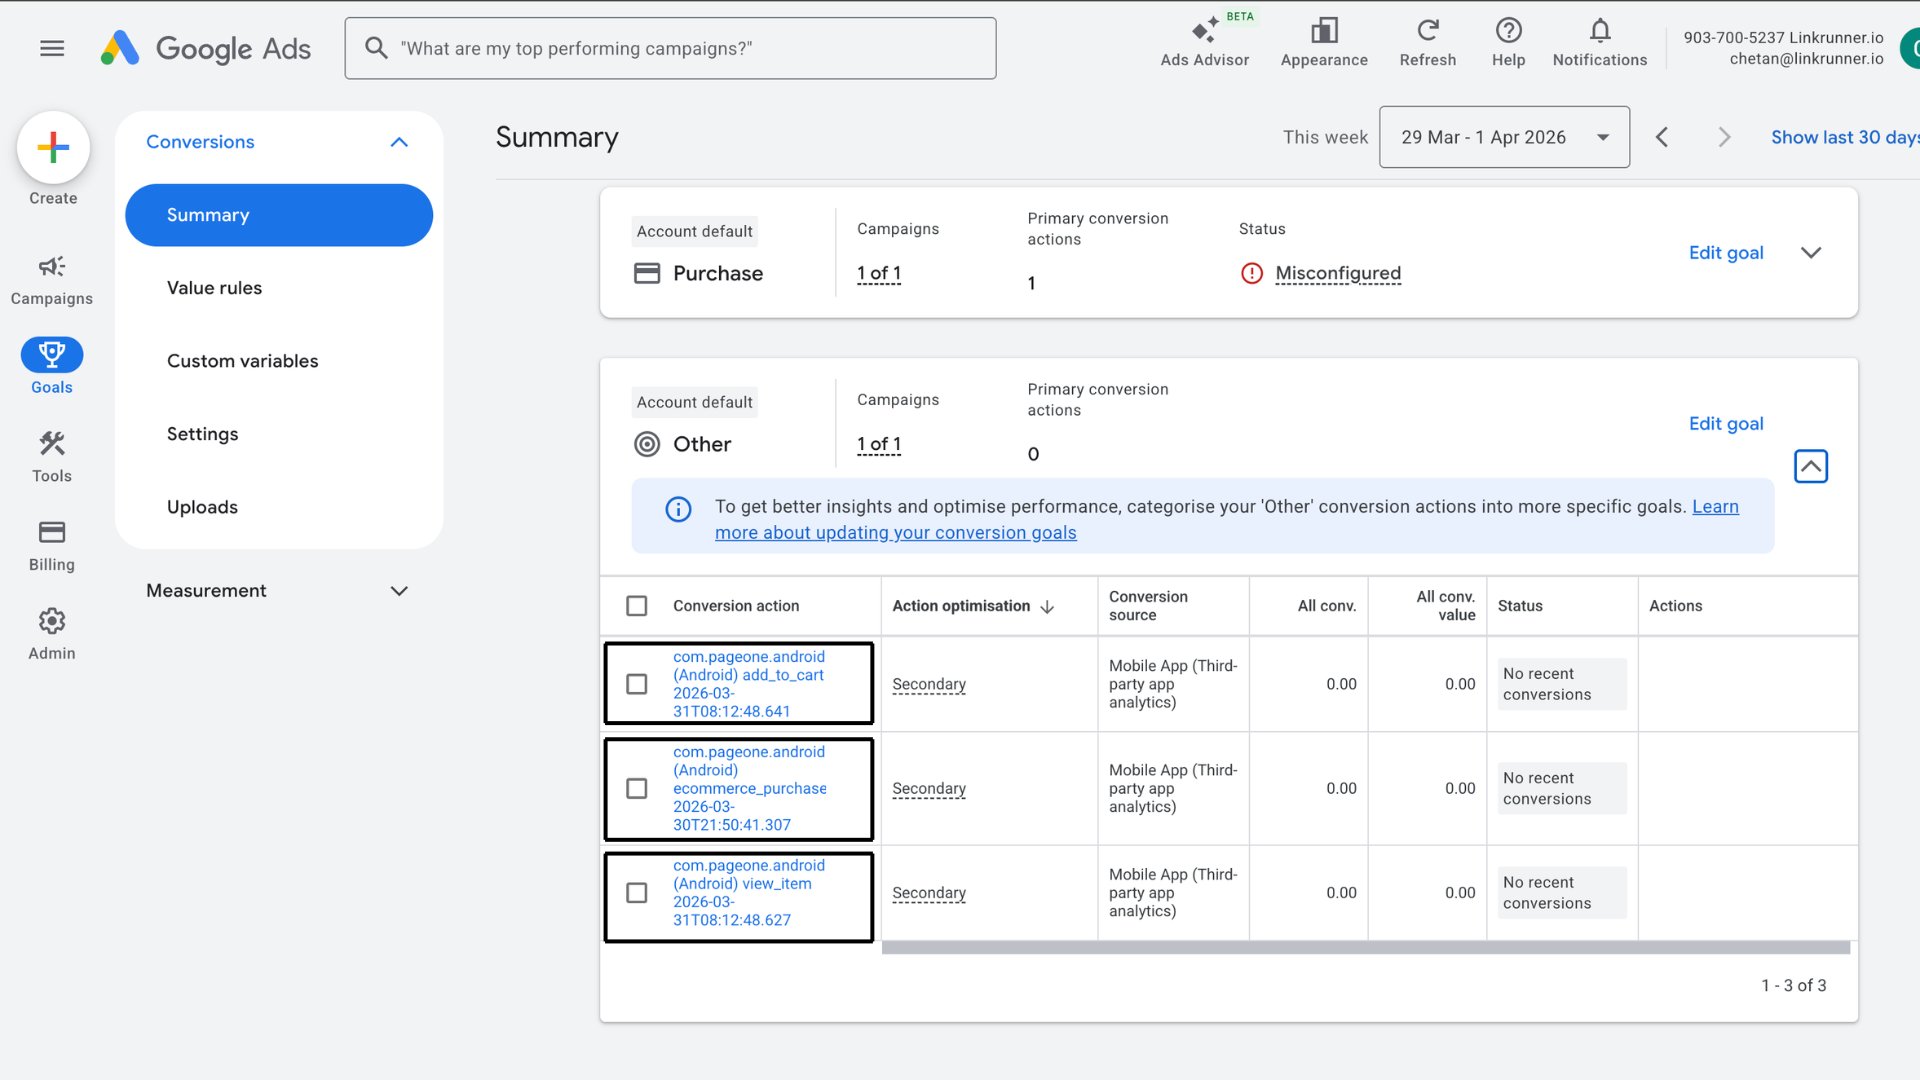
content_ids match your Merchant Center catalog.
Note: Theevent_datafields above can be sent via the Linkrunner SDK (trackEventandcapturePaymentmethods) or directly via the APIs. For full request schemas, refer to the Capture Event API and Capture Payment API documentation.